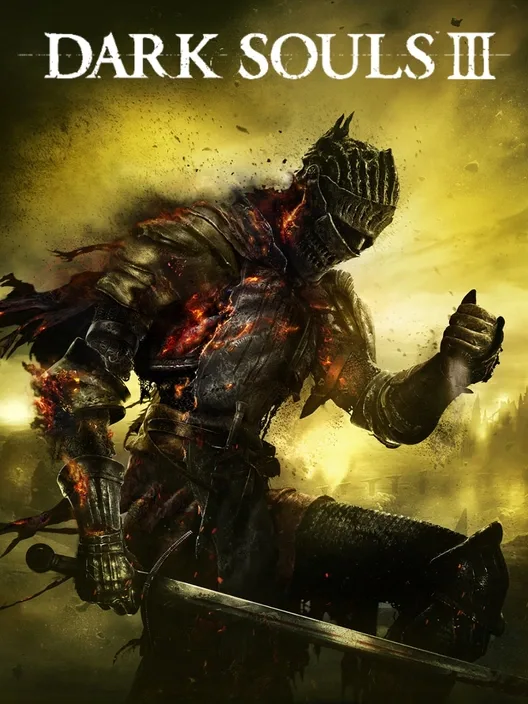
- A starting class is a stat spread and a loadout, not a locked-in role. Every stat can be raised freely from level one.
- Knight is the easiest first pick: high Vigor, a shield, and armour heavy enough to survive early mistakes.
- Estus Flasks heal HP; Ashen Estus Flasks restore FP for spells and weapon arts. The Ashen Estus Ring at the Firelink Shrine well lets you split the total between the two.
- A Strength and Dexterity "quality" build is the forgiving default: almost every good weapon in the game scales with one or both, so a mixed spread is never wasted.
- Poise is now tied to specific armour sets and a few weapon arts rather than a stat you can freely stack, so trading hits with heavy weapons works only with the right gear.
- Ashes of Ariandel is built for the midgame, before or around the Twin Princes; The Ringed City is the endgame, meant for after the main story's final boss.
- A handful of covenants and NPC questlines lock out permanently if you kill the wrong person or move on to the wrong area too fast, so it pays to slow down at Firelink Shrine.
What Dark Souls III actually is#
Dark Souls III is FromSoftware's 2016 action RPG, released on 24 March 2016 in Japan and worldwide on 12 April 2016, for PlayStation 4, Xbox One and PC. It closes out the Dark Souls trilogy and, mechanically, sits between Dark Souls II and Bloodborne: faster movement, a real jump attack, weapon arts on every weapon, and a stamina-and-poise combat system that punishes greed harder than either of its predecessors did.
There is no difficulty setting, no map, and very little explicit instruction. The game tells its story through item descriptions, environmental storytelling and cryptic NPC dialogue rather than cutscenes, and it expects you to die, learn the pattern, and try again. That structure is intentional, not a flaw, and this guide exists to remove the parts of the learning curve that come from missing information rather than from missed dodges.
Choosing a class: it's a starting point, not a commitment#
Every class sets your starting level, attributes and equipment. None of it is permanent. Every level-up spends souls on one attribute of your choice, so a class only decides how the first few hours feel, not what your character eventually becomes.
| Class | Starting focus | Why pick it |
|---|---|---|
| Knight | Vigor, Strength, a shield and a longsword | The safest first character. High health and armour forgive mistakes while you learn enemy timing. |
| Warrior | Strength and Dexterity, a straight sword and shield | Similar to Knight but leaner, with faster starting weapons. A good second choice. |
| Mercenary | Dexterity, dual scimitars | Fast, aggressive, but thin armour. Rewards players who already know how to dodge. |
| Herald | Faith, a spear and a healing miracle | The only class that starts with its own heal spell, useful if you want to learn miracles from the outset. |
| Thief | Dexterity, a dagger and a bow | Backstab-focused and fragile; better once you already understand enemy positioning. |
| Assassin | Dexterity, a rapier and a bow with a free stealth-attack ash | Similar idea to Thief with a bit more early utility. |
| Sorcerer | Intelligence, a staff and Soul Arrow | Strong ranged damage from the very start, but very low health. |
| Pyromancer | Balanced Intelligence and Faith, a flame that scales with both | Pyromancies hit hard early and need less investment than pure sorcery or faith. |
| Cleric | Faith, a mace and a healing miracle | A faith starting point built around blunt weapons rather than the Herald's spear. |
| Deprived | All stats equal, a club and no armour | Starts at a higher level than the other classes to compensate. A challenge-run pick, not a first character. |
For a first run, Knight is the safe, boring, correct answer: enough Vigor to survive two or three hits while you're still learning bosses, and a shield that lets you block-and-learn instead of dodge-and-guess. Warrior is a fine alternative if blocking feels passive to you. Everyone else asks you to already understand the game's rhythm before you've had a chance to learn it.
Gift selection matters less than the class itself. The Life Ring (extra HP) or a bundle of Firebombs are both sensible picks for a first character; the Pendant, which does nothing, is not.
Core mechanics: Estus, poise, weapon arts and bonfires#
Estus and Ashen Estus
Dark Souls III splits your healing item into two flasks that share a single upgrade path but a separate pool of uses. The Estus Flask restores HP; the Ashen Estus Flask restores FP, the resource spent on spells, miracles, pyromancies and weapon arts. Both are upgraded together at bonfires using Undead Bone Shards, and both flasks' individual charge counts can only be increased once you find the Ashen Estus Ring, sitting in the well at Firelink Shrine after you defeat the Curse-Rotted Greatwood. Talk to the Handmaid to reallocate charges between the two flasks; a melee character with no spells at all can put every charge into HP.
Poise
Poise in Dark Souls III is not the free stat it was in Dark Souls II. Most armour contributes very little poise on its own; large amounts of poise mostly come from specific heavy armour sets (such as Havel's or the Wolf Knight's set) and from a handful of weapon arts (like Stomp or certain greatsword and ultra-greatsword arts) that grant temporary "super armour," letting you tank a hit mid-swing without being staggered. Outside of those windows, almost any weapon can interrupt almost any other attack. That single fact is why trading hits carelessly with a big weapon usually loses; poise has to be earned through gear or timing, not assumed.
Weapon arts
Every weapon has a unique weapon art, activated by holding L2/LT (or the equivalent key) and pressing the attack button, and it costs FP from the Ashen Estus pool. Weapon arts range from simple stance changes to full attacks: a straight sword's Stance lets you follow up with a thrust, a greataxe's Warcry buffs damage, and a spear's Perseverance grants poise to trade hits. Learning your starting weapon's art in the first hour is worth more than learning a second weapon.
Bonfires
Resting at a bonfire heals you fully, refills both flasks, respawns most regular enemies, and lets you level up, upgrade equipment, change your burial gift, and warp to any other discovered bonfire. Bonfires are also where you spend souls; carrying a large amount of unspent souls into a risky area is optional, not required, and resting often is free.
Dying drops your souls at the spot of death as a bloodstain. Reach it to recover them; die again on the way and they're gone permanently, with two exceptions: the Symbol of Avarice headpiece guarantees a small soul return even on a second death, and a bloodstain never disappears from time alone, only from a second death.
Build basics: what your stats actually do#
Dark Souls III has eight primary attributes: Vigor (HP), Attunement (spell slots), Endurance (stamina and equip load), Vitality (equip load and poise health), Strength, Dexterity, Intelligence, Faith, and Luck. For a first build, three of them decide almost everything:
| Stat | What it does | Beginner priority |
|---|---|---|
| Vigor | Raises maximum HP; the softcap most guides mention sits around 27 and again near 40 | High, always. Most early deaths are a health problem, not a technique problem. |
| Endurance | Raises stamina, which every attack, roll and block consumes | Medium-high. Around 20 stamina is comfortable for most weapons and rolling patterns. |
| Strength / Dexterity / Faith / Intelligence | Damage stats. Weapons scale with one, two, or occasionally three of these | Depends on build, but a mixed Strength/Dexterity spread works with the widest range of weapons. |
Archetypes, briefly
- Strength builds use heavy weapons — greatswords, ultra-greatswords, hammers — for high per-hit damage and, with the right armour, access to poise trading.
- Dexterity builds favour faster weapons like katanas, rapiers and curved swords, relying on attack speed and weapon arts rather than raw hit weight.
- Faith builds cast miracles for healing, buffs and lightning damage, and pair well with blunt weapons since several faith-scaling weapons are maces and hammers.
- Sorcery (Intelligence) builds use staves for ranged magic damage, trading melee survivability for the ability to fight from outside an enemy's attack range.
- Quality builds split investment between Strength and Dexterity. This is the easy default for a first character: the large majority of the game's weapons, including most straight swords, greatswords, spears and katanas, scale with both stats to some degree, so points are rarely wasted, and a quality build can pick up almost any weapon it finds and use it competently without redesigning the character.
A sensible early spread for a first character is Vigor to around 20-27, Endurance to around 20, and the rest split between Strength and Dexterity as gear demands. Respeccing exists via the Pale Tongue, purchasable in limited quantity from the Handmaid once you've helped Yoel of Londor, but it's not unlimited, so it's worth treating early points with some care rather than none at all.
The two DLC expansions and when to play them#
Dark Souls III received two paid expansions, both included in the Season Pass and in the Fire Fades Edition / Game of the Year bundle.
| Expansion | Released | Access point | Recommended timing |
|---|---|---|---|
| Ashes of Ariandel | 25 October 2016 (worldwide, following a 21 October Japan release) | An item, the Contraption Key, or a painting portal that appears in the Cathedral of the Deep after progressing the main story | Midgame, roughly after the Abyss Watchers and before or around the Twin Princes |
| The Ringed City | 28 March 2017 | A summoning door that appears at the Dreg Heap once you have both expansions installed, or through the Filianore's Rest bonfire path | Endgame, intended to follow the main game's final boss, Soul of Cinder |
Ashes of Ariandel drops you into the snowy Painted World of Ariandel, a shorter area with two boss fights: the Champion's Gravetender fight and, at the end, the two-phase duel against Sister Friede and Father Ariandel, one of the series' most technically demanding boss encounters. It's paced for a character who has already cleared most of the main game's midgame areas; going in too early against Friede specifically is a rough wall.
The Ringed City is built as the true ending of the trilogy. It sends you to the Dreg Heap and then the Ringed City itself, the last standing fragment of the world, and closes with Slave Knight Gael, widely considered the hardest single boss FromSoftware had made up to that point, plus an optional fight against Darkeater Midir. Both DLCs assume you've already finished the base game's story and have a well-upgraded weapon; going in underlevelled against Gael in particular turns a boss fight into a wall.
The practical order for a first playthrough: finish the main game up through Soul of Cinder first, since The Ringed City's story only makes sense after that ending. Ashes of Ariandel can be played earlier, once its portal appears, without spoiling anything, so many players slot it in around the midgame rather than waiting until after the credits.
Covenants and NPC questlines you can accidentally lock out of#
Dark Souls III's optional content is dense, unmarked, and unforgiving of a rushed playthrough. None of this blocks the main story, but it's easy to permanently miss.
Covenants
Covenants are factions you pledge to at a specific item or NPC, each with its own reward track paid in a covenant-specific item you earn by playing a certain way (helping other players, invading them, or fighting specific enemies). A few are easy to miss entirely:
- Rosaria's Fingers, for invading other players as a red phantom, is offered by Rosaria in the Cathedral of the Deep — but attacking Rosaria to obtain her Bed of Chaos-adjacent item, or otherwise mishandling that NPC, removes access to her.
- Aldrich Faithful and Watchdogs of Farron both have entry points that are easy to walk past without noticing, since neither is flagged by any quest marker.
- Way of Blue and Blade of the Darkmoon are tied together: joining one shapes how you can interact with the other later, and both connect to Anor Londo's approach.
NPC questlines
Several major NPC arcs branch or dead-end based on choices that don't look like choices at the time:
- Siegward of Catarina's questline, one of the game's more good-natured story threads, can dead-end if you don't free him from a specific cell in the Profaned Capital before triggering the area's boss fight, or if you kill Yhorm the Giant without Siegward present for it.
- Yoel of Londor and Yuria of Londor offer a path to "Usurpation of Fire," an alternate ending, through a series of dialogue-triggered level-ups. Progressing too far into the game, or making certain other NPC choices, can close this path before you realize it existed.
- Greirat of the Undead Settlement can be sent to loot two different areas for you, but sending him to the second area (Irithyll) too early, before he's better equipped, can get him killed permanently, ending his storyline and losing the items he would otherwise bring back.
- Anri of Astora's questline, tied to a wedding you can intervene in, changes outcome heavily based on whether you talk to Anri and Horace at the right points and which side you side with — and it's entirely possible to miss it by never returning to Firelink Shrine to check on wandering NPCs.
The general rule that avoids most of this: return to Firelink Shrine and talk to every NPC there after every major boss kill, since that's how most of these questlines advance and how you're warned before a point of no return.
A rough route through the main areas#
Dark Souls III is more linear than Dark Souls I or Elden Ring, but it still branches enough to disorient a first-time player. High Wall of Lothric is the starting area and loops back to Firelink Shrine once its two paths (toward Vordt of the Boreal Valley, or down toward the Undead Settlement) are cleared. From there, the intended order is roughly: Undead Settlement, Road of Sacrifices, Cathedral of the Deep, Farron Keep, Catacombs of Carthus, Irithyll of the Boreal Valley, Irithyll Dungeon and the Profaned Capital, Anor Londo, Lothric Castle, Consumed King's Garden, Grand Archives, and finally the Untended Graves and Kiln of the First Flame.
A few of those branch rather than gate. Farron Keep and the Road of Sacrifices can be tackled in either order relative to the Cathedral of the Deep, and several optional detours, the Archdragon Peak, reached from a hidden path in Irithyll of the Boreal Valley, and the Untended Graves, a dark mirror of Firelink Shrine hidden behind the Champion Gundyr fight, are easy to miss entirely because nothing points to them. Archdragon Peak in particular holds one of the best fights in the game, against the Nameless King, and its entrance, a specific illusory wall near a bridge overrun by wyverns, is one of the most commonly missed secrets in the series.
| Boss | Area | Why it matters |
|---|---|---|
| Iudex Gundyr | High Wall of Lothric (tutorial) | Teaches the roll timing the rest of the game assumes you already know. |
| Vordt of the Boreal Valley | High Wall of Lothric | A fair, slow first real boss; a good gauge for whether your build is ready to move on. |
| Curse-Rotted Greatwood | Undead Settlement | Clearing it opens the well at Firelink Shrine and the Ashen Estus Ring inside it. |
| Abyss Watchers | Farron Keep | A three-phase fight against a fighting cult; widely considered one of the best-designed encounters in the game. |
| Pontiff Sulyvahn | Irithyll of the Boreal Valley | Summons a shadow clone of himself; a hard difficulty spike that gates the rest of Irithyll. |
| Yhorm the Giant | Profaned Capital | Tied directly to Siegward's questline; fighting him without Siegward changes the encounter for the worse. |
| Aldrich, Devourer of Gods | Anor Londo | One of the four Lords of Cinder; required for the main ending. |
| Dancer of the Boreal Valley | Lothric Castle (optional but early access) | Can be fought right after Vordt at a much higher difficulty, or later once naturally reached; a good check on how far a build has come. |
| Dragonslayer Armour | Lothric Castle | A long, punishing fight that rewards patience and shield use. |
| Nameless King | Archdragon Peak (optional) | Widely regarded as one of the hardest fights in the base game; entirely missable if the hidden path isn't found. |
| Soul of Cinder | Kiln of the First Flame | The final boss of the base game, fought after gathering all four Lords of Cinder souls. |
Frequently asked questions#
How long does Dark Souls III take to finish? The main story runs roughly 30 to 35 hours for a first playthrough that explores at a normal pace. Both DLCs together add another 8 to 12 hours, and a full completionist run, including all covenants and endings, runs well past 60 hours.
Is there an easy mode? No, and none has been added since release. The tools available instead are online summons (both NPC and player), a well-upgraded weapon, and simply exploring elsewhere to gain levels before returning to a hard fight.
Which starting class is best for a first playthrough? Knight, for the health pool and the shield. Warrior is a close second for players who'd rather learn to dodge than to block.
Do I need to finish the base game before playing the DLC? The Ringed City is meant to follow the ending, so play it last. Ashes of Ariandel can be played mid-story once its portal opens, without spoiling the main plot.
Can I respec my character? Yes, through the Pale Tongue item after progressing Yoel of Londor's questline, but the number of respecs is limited, so it's worth planning your first twenty or so levels with some intent.
Is online play still working in 2026? Yes. After the 2022 security shutdown and the August 2022 fix, PC online services have remained active, with occasional routine maintenance windows like any live service.
What's the easiest build for someone new to the series? A Strength/Dexterity "quality" build, since most of the game's weapons scale with one or both stats, so a Knight or Warrior can pick up nearly anything they find without wasting stat points.