- Forget everything you know about builds and stats. Sekiro has no classes, no equipment load and only two things to raise: Vitality/Posture and Attack Power, both gained mostly from exploration and bosses, not grinding.
- Deflecting, not dodging, is the core skill. Pressing block right as a hit lands negates the damage and, more importantly, damages the enemy's Posture instead of their health.
- A full health bar means nothing if Posture is broken. Most fights, including every major boss, actually end with a Posture-break deathblow, not by draining Vitality to zero.
- Death is not a soft reset. You resurrect on the spot once per encounter through Shinobi's resurrection, and dying still risks Dragonrot, a status that spreads to NPCs unless a die roll called Unseen Aid saves you.
- The grappling hook is not just traversal. It is a combat tool for escaping bad fights, closing distance instantly, and reaching sightlines for stealth kills.
- Kuro's Charm is equipped from the very start and quietly removes the permanent stat loss other FromSoftware games are known for. Taking it off is an optional, harder way to play, not the default.
- The Gauntlets of Strength and Reflections of Strength boss-rush modes, added for free in the October 2019 Game of the Year update alongside the Remnants feature, are easy to miss because nothing in the story points to them.
What kind of game this actually is#
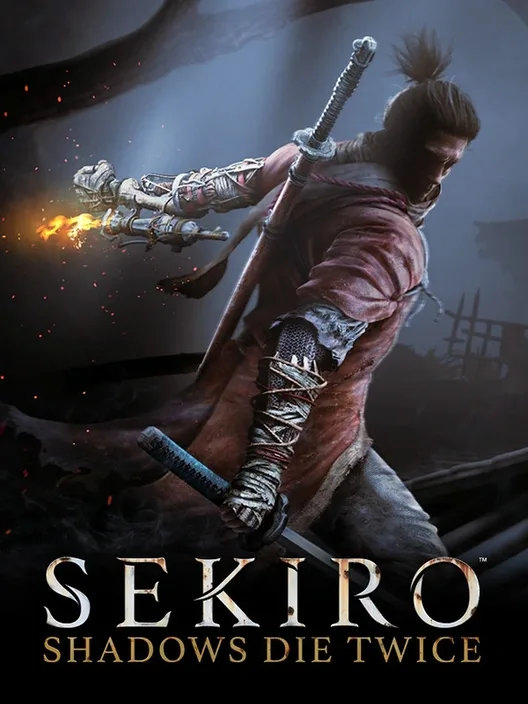
Sekiro: Shadows Die Twice was released by FromSoftware on 22 March 2019 for PlayStation 4, Xbox One and PC. It shares a studio and a sense of atmosphere with Dark Souls and Bloodborne, but it is not one of them, and playing it like one is the single biggest reason new players struggle. There is no character build. There is no equipment load, no armour sets, no spell schools, no multiplayer, and no option to out-level a boss by farming a field for an hour. You play one character, Wolf, a shinobi bound to protect a young lord named Kuro in a fractured, fantastical version of late-1500s Japan, and the way you get stronger is by learning the game, not by adjusting numbers around it.
That single design choice reshapes the entire combat loop. In Dark Souls, a big health bar and a strong dodge roll let you win almost any fight through patience and positioning. In Sekiro, health matters far less than it looks like it should, because nearly every enemy of consequence, from a common spearman to the final boss, is actually being fought over a second, hidden resource: Posture. Understanding that one fact before you start is worth more than any list of item locations.
Posture and Vitality: the system everything else depends on#
Every character on the screen, from Wolf to the smallest foot soldier to Isshin Ashina himself, has two bars.
| Bar | What it represents | How it fills or drains | What happens when it runs out |
|---|---|---|---|
| Vitality (health) | Raw survivability | Drops on any hit that connects, whether blocked, deflected or taken clean | Death, unless a resurrection is available |
| Posture (stance) | Balance and composure under pressure | Rises when attacks land, when hits are blocked without deflecting, and passively decays over time when the character is not under pressure | The character is staggered and open to a deathblow, an instant, guaranteed critical hit |
The crucial detail is that both bars exist on you and on every enemy at the same time, and combat is really a race to break the other side's Posture before your own gives out. A boss with a huge Vitality pool can still be killed in a fraction of the time a straightforward damage race would take, because once its Posture breaks, a single deathblow removes a large chunk of Vitality outright; against most bosses, two or three Posture breaks and deathblows end the fight regardless of how much health is technically left. This is why simply chipping away at a boss's health with safe pokes, the Dark Souls approach, often takes far longer and is far riskier than learning to pressure its Posture directly.
Posture behaves differently depending on the situation:
- Attacking raises the enemy's Posture, especially strikes that land while they are not guarding.
- Blocking an attack (holding guard without perfect timing) still raises your own Posture a little and chips a small amount of Vitality, so blocking constantly is not a safe fallback.
- Deflecting an attack at the right instant raises the enemy's Posture significantly and barely touches yours, which is the entire reason deflecting is the skill the game is built around.
- Standing still and not fighting lets Posture drain back down over time; an aggressive character with full Vitality but broken Posture will recover if given space, so finishing a stagger quickly matters.
A practical early habit: stop watching the enemy's Vitality bar entirely during a boss fight and watch their Posture bar instead. It tells you exactly how close you are to a deathblow, and it goes up fastest when you are deflecting well and attacking in between deflects, not when you are simply trading hits.
Deflecting versus dodging: the mindset shift#
New players who arrive from other FromSoftware games instinctively reach for a dodge-and-punish rhythm, because that is what years of Dark Souls and Bloodborne teach. Sekiro has a dodge button and it works, but it is a supporting tool, not the main defensive option, and treating it as the primary answer to every attack is the most common reason beginners bounce off the game in the first few hours.
The main defensive tool is the deflect: pressing the block button at the moment an attack connects, rather than holding it in advance. A successful deflect produces a distinct clang and a shower of sparks, costs you almost no Posture, and damages the attacker's Posture heavily. Blocking early and holding it also stops the hit, but it drains your own Posture and chips your Vitality, so a long combo that is merely blocked rather than deflected will eventually stagger you even if none of the hits are dodged or missed. Deflecting every hit in a combo, by contrast, can break even a tough enemy's Posture before their combo finishes.
A few situational rules make the system click:
- Regular strikes and combos: deflect. This is the default response to almost everything.
- Unblockable "Perilous" attacks with a red kanji flash: these must not be blocked or deflected outright. There are two families, and mishandling them is the single most common cause of avoidable damage:
- A sweeping low attack (marked by the enemy crouching or a horizontal glow) is dodged with a jump, since a low sweep will not reach you in the air.
- A thrust attack (marked by a lunging stance) is answered with the Mikiri Counter, a learnable skill where you step directly into the thrust and stomp it down, which both avoids the damage and devastates the attacker's Posture. It has to be unlocked as a skill and practiced deliberately; it is one of the highest-value skills in the entire game and is taught early by Owl in a flashback at Hirata Estate.
- A grab attack is dodged sideways or backward with a normal dodge, since neither deflecting nor the Mikiri Counter works against it.
- Projectiles and gunfire: dodging or using the right prosthetic tool (the Loaded Umbrella blocks projectiles outright) beats deflecting.
Learning to read which of these is coming, purely from the enemy's wind-up animation and the red warning flash, is the actual skill Sekiro is testing. It takes real repetition, and that repetition is the intended difficulty curve, not a flaw to route around with better gear.
Death, resurrection and Dragonrot#
Wolf can resurrect on the spot after being struck down, once his resurrection charge is available, by pressing a button as the "you died" prompt would normally appear. This is not unlimited: a base charge recovers after landing enough hits on enemies, and a second charge, unlocked through story progress at Sculptor's Idols, recovers only by performing deathblows. Resurrecting mid-fight and immediately following up while the enemy is off guard is a core, intended tactic, not a cheat; several boss fights are meaningfully easier when the resurrection is used offensively rather than saved purely as a safety net.
Dying for real (running out of both resurrections, or choosing not to use one) carries a unique consequence: a chance of Dragonrot, an illness that can spread to certain NPCs around the world, changing some of their dialogue and quest availability until it is cured with an item obtained later in the story. Whether Dragonrot triggers on a given death is decided by Unseen Aid, an invisible dice roll that also determines whether you keep your Sen (currency) and experience points instead of dropping them at your death location. Both systems exist specifically so that death feels consequential without erasing hours of a build the way losing souls at a bonfire's distance would in Dark Souls, since Sekiro has no stat build to lose in the first place.
Kuro's Charm: the game's built-in easy setting, sort of#
From the opening hours, Wolf wears Kuro's Charm, a passive charm equipped by default that quietly protects him against a permanent form of aging and weakening the story otherwise threatens. Removing it is an optional choice offered later, and doing so is explicitly a self-imposed harder mode: without it, blocking (not deflecting) chips noticeably more Vitality, enemies hit harder and have tougher Posture and Vitality, but Sen and Skill Experience gains increase and combat feels sharper because sloppy blocking is punished. New players should simply leave Kuro's Charm on and ignore this system entirely on a first run; it exists for repeat playthroughs and challenge runs, not as something a first-time player needs to think about.
The grappling hook: traversal, combat and stealth in one tool#
The Shinobi Prosthetic's grappling hook is available from very early on and is used constantly, on marked grapple points shown as a small green glimmer or an obvious branch, ledge or roof. It matters for three separate reasons that a new player should internalize immediately:
- Traversal. Sekiro's world is vertical rather than sprawling, with rooftops, cliffs and tree branches layered over every area. Grapple points chain together to move quickly across a level, and learning a level's grapple lines is closer to learning a level layout than any map ever is.
- Combat escape. In an unwinnable fight, or against a group that has spotted you, grappling to a rooftop breaks line of sight and resets aggression, buying time to heal, reposition or plan a stealth approach instead. This is a deliberate design choice: retreat is always available and never treated as a failure state.
- Stealth positioning. Grappling to a high vantage point over an unaware enemy sets up a stealth deathblow, an instant kill (or an instant Posture break against tougher enemies and some bosses) delivered from a crouch or a drop attack.
Stealth basics: why sneaking is not optional#
Sekiro rewards a stealth-first approach to nearly every area more than any other FromSoftware game, because a stealth deathblow removes an entire health bar's worth of a strong enemy for free, and against enemies with two or three Vitality bars (most minibosses and some regular enemies), landing a stealth deathblow before a fight starts effectively cuts the encounter in half or more.
The basics: crouching lowers your profile and noise; staying out of an enemy's forward vision cone and out of earshot keeps you undetected; tall grass and shadows help conceal Wolf visually, and idol statues let you reset an area's enemies, retry a stealth approach or fast travel. A small warning icon appears above an enemy's head as they notice something is wrong, giving a brief window to break contact before full alert. Whistling with a specific prosthetic tool lures a single enemy away from a group, and throwing a firecracker startles and staggers even large bosses briefly, both of which turn a dangerous open fight into a manageable series of one-on-one stealth kills.
Areas with multiple patrolling enemies are almost always meant to be thinned out with stealth kills before engaging whoever is left directly. Rushing in with a sword against a full group is rarely the intended solution and is one of the most common reasons a beginner finds an area unfairly hard when it was actually meant to be approached from the rooftops.
The Shinobi Prosthetic: tools and how to use them#
Wolf's left arm is a mechanical prosthetic that accepts interchangeable tools, found and unlocked throughout the story rather than bought as a full kit up front. Each tool is powered by Spirit Emblems, a consumable resource bought from merchants, crafted, or found in the world, so tool use has to be managed rather than spammed freely.
A short list of the tools every new player benefits from learning early:
| Tool | What it does | Good against |
|---|---|---|
| Grappling Hook | Traversal and repositioning, as described above | Everything, constantly |
| Shuriken | Fast ranged poke, no charge-up | Flying enemies, interrupting an enemy before they close distance |
| Loaded Axe | Slow, heavy swing that breaks Posture hard and destroys shields | Shielded enemies who otherwise block everything |
| Loaded Spear | Pulls enemies toward you or rips off a limb from bloated/centipede-type foes | Grabbing distant enemies, specific enemy types with a visible weak point |
| Flame Vent | A short-range fire jet, upgradeable into a longer, stronger flame | Beasts and undead-type enemies, who take extra fire damage |
| Loaded Umbrella | Blocks projectiles and unblockable strikes outright when timed | Gun-users and specific attacks that cannot be deflected |
| Firecracker | Startles enemies and staggers beasts, briefly stunning even some bosses | Dogs, apes, and any enemy or boss vulnerable to the stagger |
Tools are upgraded with materials found in the world and crafted at Sculptor's Idols, and the right tool for a specific enemy is often the actual solution to a fight that looks impossible with the sword alone; the game is generous about hinting at this through item descriptions and enemy behaviour, but it never states it outright, so experimenting with prosthetics against a fight that feels stuck is worth doing before assuming more practice with the blade is the only answer.
Skill trees and how Wolf actually gets stronger#
Sekiro replaces attribute points with two separate, much simpler systems, plus a skill tree for actual new techniques.
Vitality and Posture increase together by spending Prayer Beads, an item dropped by certain bosses and found in the world, at a Sculptor's Idol. Four beads raise Wolf's maximum Vitality and Posture by one level; there are enough beads across the game to reach a fixed cap.
Attack Power increases separately and permanently by consuming Memories, unique items dropped by story bosses (for example, defeating Genichiro, Lady Butterfly or Owl each yields one), also spent at a Sculptor's Idol. These are not missable in the way a hidden item is, since they come directly from mandatory or near-mandatory bosses, but a new player should know that a boss that feels unfairly strong is sometimes better answered by finishing an optional area for Attack Power and Prayer Beads first, rather than repeating the same fight dozens of times with no changes.
Skill Points, earned continuously from defeating enemies (they accumulate the way experience would, but only ever unlock skills, never raw stats), are spent in skill trees represented as branching constellations, unlocked by talking to Sculptor after gaining points and by finding specific in-world texts. The core trees include:
- Shinobi Arts: general shinobi skills such as the Mikiri Counter, stealth deathblow follow-ups, and combat art techniques usable with any weapon.
- Prosthetic Arts: passive upgrades to prosthetic tools, including more Spirit Emblem capacity and stronger tool effects, unlocked by having the Sculptor fit several prosthetic tools onto Wolf's arm.
- Ashina Arts: sword-focused combat arts and passive Posture-related bonuses, unlocked through a specific favour for a named NPC found near the game's early Ashina Castle area.
- Two further trees become available later in the story, tied to specific story and world progress, and expand both combat arts and passive bonuses further.
None of these trees are missable permanently in a single playthrough as long as the relevant NPCs and bosses are found, but a first-time player who never talks to the Sculptor about new skills, or never revisits him after unlocking new prosthetic tools, can go a long way without realizing an entire tree of skills is sitting unused. Checking in with the Sculptor after every prosthetic tool or major story beat is worth making a habit.
Commonly missed content#
A first playthrough of Sekiro is fairly linear compared to an open-world FromSoftware game, but it still hides a meaningful amount of content that a straight run to the credits will skip entirely.
- Optional areas with their own bosses and Prayer Beads. Several areas are entered through side paths, hidden branches on the grapple network, or dialogue choices, and skipping them means skipping both Attack Power and Vitality upgrades that make the mandatory bosses noticeably easier.
- Multiple endings. Sekiro has several distinct endings determined by choices and items collected in the final third of the story, including a notably different, harder final stretch on one specific path. A first-time player aiming for a particular ending should be careful about item choices late in the game, since some choices lock others out for that playthrough.
- New Game Plus. Completing the story allows a new playthrough that carries over Attack Power, Vitality, Posture and skills while resetting the story and adding stronger enemies, which is the intended way to see the other endings without starting completely from zero.
- Gauntlets of Strength and Reflections of Strength. Added for free on 29 October 2019 as part of the Sekiro: Shadows Die Twice Game of the Year Edition update, these are boss-rush modes accessed once specific story points are reached: Reflections of Strength lets you refight any boss you have already defeated individually, while Gauntlets of Strength string together a series of boss rematches that must be completed in a single attempt without dying. Because nothing in the main story announces them, many players who finished the game before the update, or who never revisit their save afterward, never see this content at all.
- Remnants. The same October 2019 update added Remnants, a feature that lets players leave short, ghost-like replays of their own deaths or actions for other players to see in their world, similar in spirit to bloodstains in Dark Souls but built specifically around Sekiro's combat.
- Idol-side merchants and hidden Sculptor's Idols. A number of idols and the merchants or item caches near them sit off the main line of sight from a given path and are easy to walk past entirely on a first run, especially anything reached by grappling upward rather than forward.
Frequently asked questions#
Is Sekiro harder than Dark Souls or Elden Ring? It asks for a different skill rather than a strictly higher one: precise timing on deflects and counters instead of positioning and build optimization. Players used to leaning on a strong build or heavy armour in other FromSoftware games often find the first several hours of Sekiro harder specifically because that option does not exist here.
Do I need to have played other FromSoftware games first? No, and in some ways prior experience with Dark Souls can work against a new player if it teaches an over-reliance on dodging and blocking instead of deflecting. The story and mechanics are self-contained.
Is there an easy mode? No difficulty setting exists. Kuro's Charm is equipped by default and softens some of the punishment for imperfect blocking, but the closest things to adjustable difficulty are practicing the Mikiri Counter, using stealth to avoid fair fights entirely, and returning to optional areas for more Vitality, Posture and Attack Power before a hard boss.
How long does Sekiro take to finish? A first playthrough focused on the main story generally runs shorter than a typical open-world FromSoftware game, with a meaningfully longer time if the optional areas, all prosthetic tools and a wider set of skills are pursued along the way.
What platforms is it on? Sekiro: Shadows Die Twice released on 22 March 2019 for PlayStation 4, Xbox One and PC.
What was added after launch? The free Sekiro: Shadows Die Twice Game of the Year Edition update, released 29 October 2019, added the Gauntlets of Strength and Reflections of Strength boss-rush modes and the Remnants feature, alongside new cosmetic outfits.
Should I turn off Kuro's Charm? Not on a first run. It is an optional way to make blocking punishing and enemies tougher in exchange for faster Sen and skill gains, intended for players who already know the game well.